What is a clickTag???
The term clickTag has its origin in Flash advertising. In HTML5 the clickTag is implemented by inserting a transparent <DIV>
tag over top of your banner. You then register an onclick event handler on that <DIV> tag, which in turn executes a single line
of JavaScript code to open the advertisers landing page in a new browser tab or window. The basic concept of the clickTag is that the third-party ad server used by the publisher
will provide the URL to be used for the clickTag at runtime. This allows them to insert their own click tracking link into the banner.
Manual Coding
Manually coding a clickTag is actually rather simple and perhaps easier than navigating through visual wizards and menus for many users.
Let us assume that the outermost <DIV> tag that wraps your HTML5 banner looks as follows:
<div id="Stage" class="EDGE-766094533"></div>
All you practically need to do is add an onclick handler to your <DIV> tag (as well as a cursor: pointer CSS rule to make it appear clickable):
<div id="Stage" class="EDGE-766094533" onclick="window.open(window.clickTag)" style="cursor: pointer"></div>
Again, the idea is that the third-party ad server will set the value of the window.clickTag variable at runtime. You should NOT put
a link to the advertisers landing page in the banner. Doing so will cause the banner to go directly to the landing page without the third-party
ad server tracking it, so don't do that!
Fixing Errors
Maybe you have been tasked with fixing a HTML5 banner with a broken or missing clickTag? Thankfully this is not
hard to accomplish. What you can do is insert a clickTag layer that sits over top of the existing banner. Here's a code that you can just copy and paste
before the </body> tag in the .html file for the banner:
<div id="clickTagLayer" style="position: absolute; top: 0; left: 0; z-index: 16777271; width: 100%; height: 100%; cursor: pointer; cursor: pointer">
</div>

<script type="text/javascript">
(function() {
  var layer = document.getElementById("clickTagLayer");
  if (layer) {
    var listen = function(obj, e, fn) {
	  if (obj.addEventListener) { obj.addEventListener(e, fn, false); } else { obj.attachEvent("on"+e, fn); }
	};
    listen(layer, 'click', function (evt) {
      evt.stopPropagation();
      try { evt.cancelBubble(); } catch (e) { /* ignore */ }
      window.open(window.clickTag, '_blank');
    });
  }
})();
</script>
That should basically solve any problems you might run into whether the advertiser did not implement a clickTag, hard coded a link or maybe they did both.
This... is... painful :(
![]() Well, you have a point there and the good folks at AdvertServe feel exactly the same way.
When you need to deploy a HTML5 banner with AdvertServe you only have to do two things: upload a ZIP file with all of the HTML5 assets and provide a landing page URL. That's it. The asset files get uploaded to our CDN and we
automatically insert a clickTag if the banner does not already have one.
Well, you have a point there and the good folks at AdvertServe feel exactly the same way.
When you need to deploy a HTML5 banner with AdvertServe you only have to do two things: upload a ZIP file with all of the HTML5 assets and provide a landing page URL. That's it. The asset files get uploaded to our CDN and we
automatically insert a clickTag if the banner does not already have one.
If your third-party ad server doesn't do that, maybe the question you should be asking is: why do you have that ad server?
Adobe Edge Example
For those of you that are not HTML5 coders, relax because we have you covered with the following visual guide for Adobe Edge.
Step #1
To begin, we are going to assume that by the grace of God you have already managed to create a HTML5 banner and you have it open in Adobe Edge.
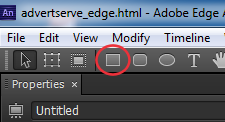
Step #2
The next thing you need to do is click on the Rectangle Tool icon in the main toolbar.
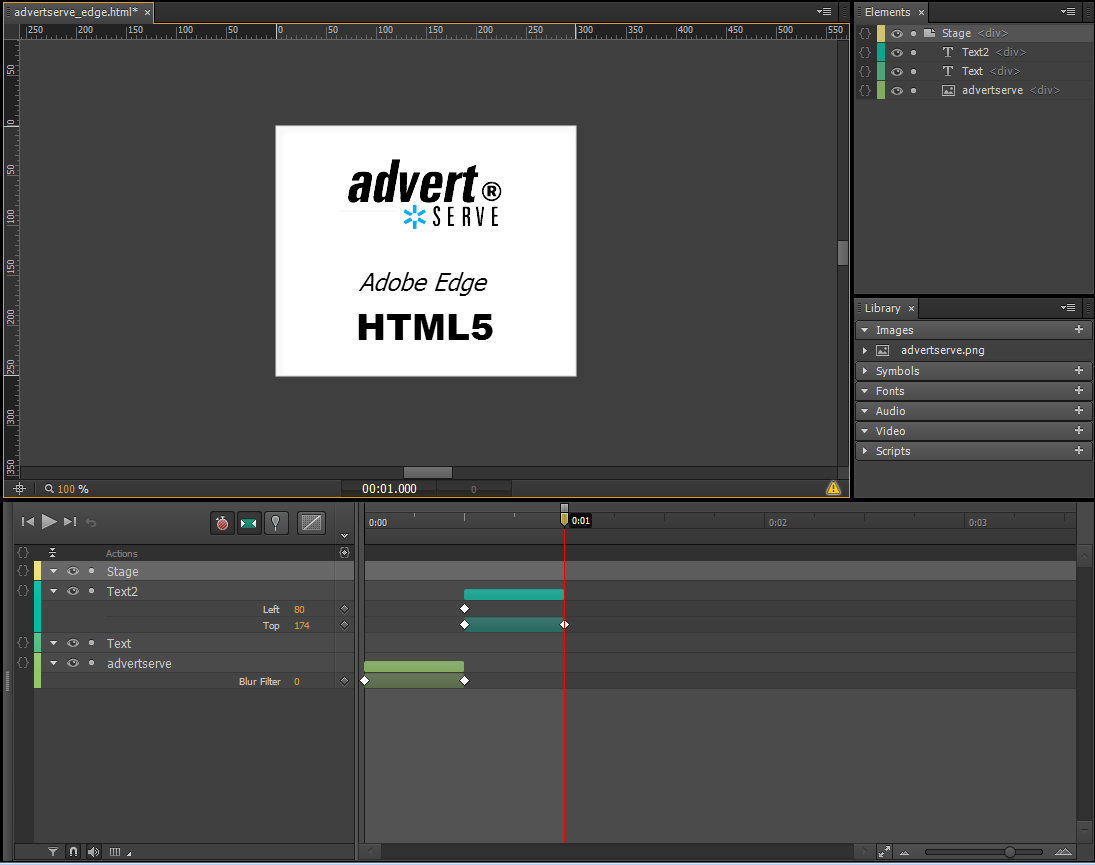
Step #3
Then you want to draw a transparent rectangle. As you can see in the screen capture below the rectangle covers the entire banner and it has a transparent background. It is also nested directly under the main stage element.
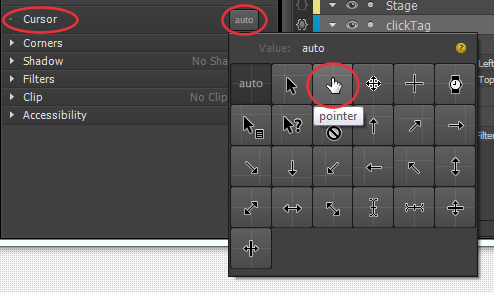
Step #4
One other thing you want to do at this point is to change the Cursor property so that when someone puts their mouse over the rectangle it will appear clickable to them by changing to the hand/pointer cursor.
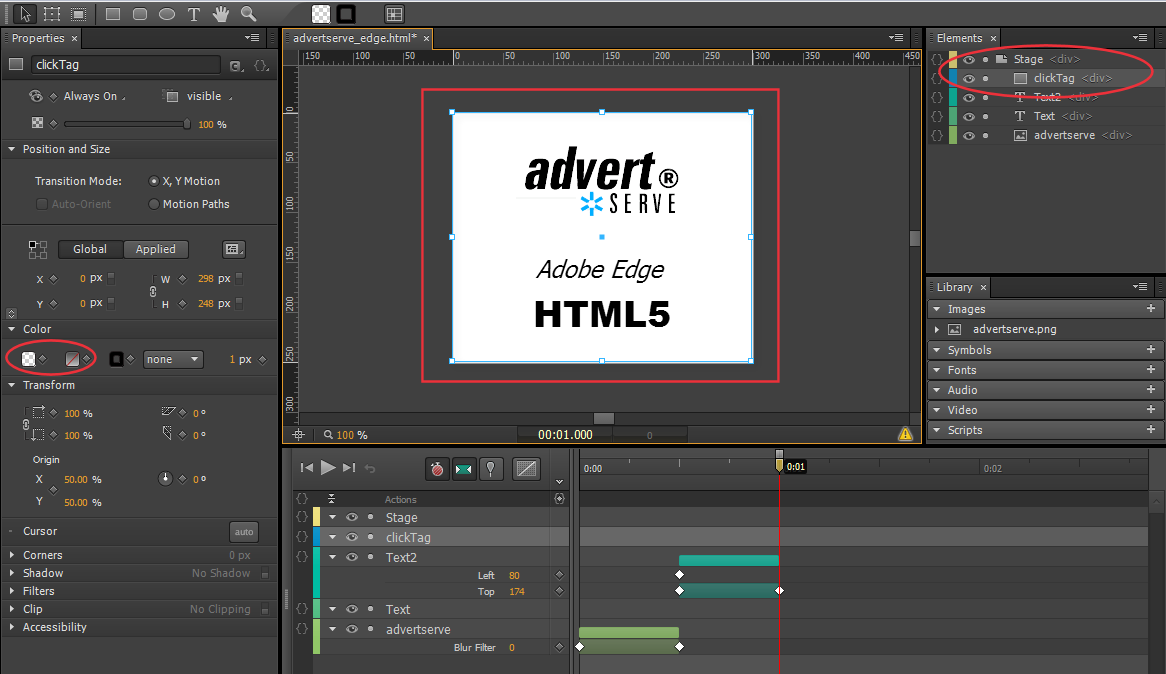
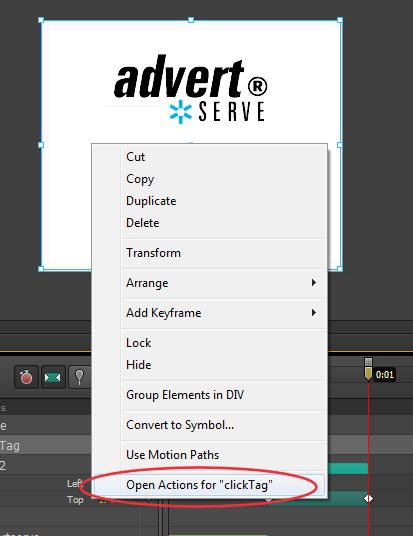
Step #5
Next, right click on the rectangle and click Open Actions for "clickTag" or whatever you named your rectangle. I named mine clickTag but it really doesn't matter what you name it. Just don't name it your favorite curse word. Let's keep the web clean people!
Step #6
Then you want to choose the click option.

Step #7
Finally, after what seems like a million steps to get here you can enter the one line of JavaScript that is needed for the clickTag!
window.open(window.clickTag, '_blank');I recommend you just copy and paste that line instead of trying to type it out.

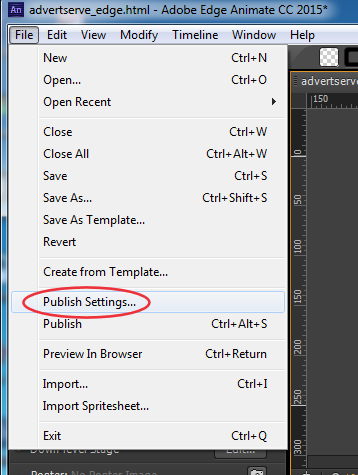
Step #8
Now you are ready publish this beast of a banner. Click on the File menu and choose Publish Settings...
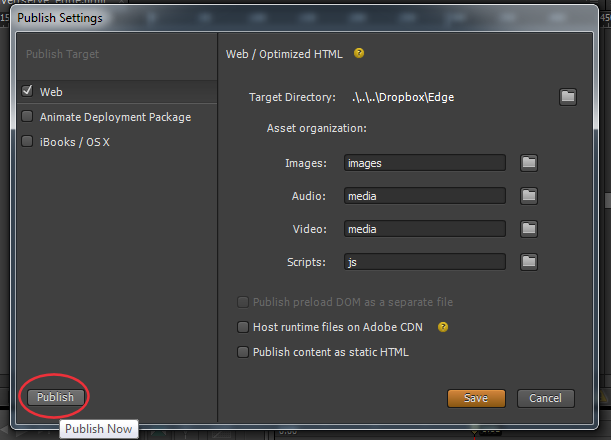
Step #9
Make sure your settings look exactly like mine below. You can change the Target Directory if you want. I actually recommend you create a different directory for every banner. Otherwise you are going to end up with a huge mess of files if you put them all in one directory. But, yeah, once you have the settings in place just click the Publish button.
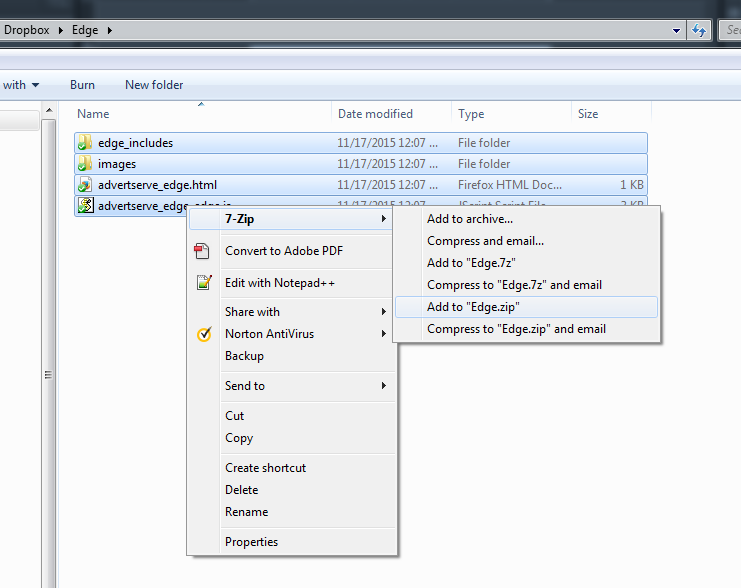
Step #10
Finally, open up that Target Directory where Adobe Edge published the files and select all of them. Then right click on one of them. Hopefully you already have some type of ZIP software installed (such as 7zip). If you do, just choose Add to Xyz.zip and you are good to go. Send that ZIP file to your publishing partners and hopefully they know what to do with them. At this point the ball is in their court. Go home and have a beer. You earned it.
Still Having Trouble?
Try downloading our sample banner and the Adobe Edge project files. Maybe those will help you figure out how it is set up. If not, hey, there is still hope: maybe you can convince your boss to switch to AdvertServe so you don't have to waste time struggling with this tedious busy work.